Garlic Naan
 Yesterday, I posted the faux-tandoori chicken from last night's dinner, as well as the greens, up on Saturday's Mouse. Here's the garlic naan side dish that became the star of the show.
There are a ton of naan recipes floating around there, with wide-ranging ingredients and prep methods. I read a lot of them. Some call for just flour and water, others are more complicated. They're cooked in frying pans and on pizza stones, over open flames, etc. The goal is fast high heat.
I started with two tablespoons of warm water and a teaspoon of honey, mixed together until well incorporated and then swished in a tablespoon of yeast and waited for it to get fluffy.
Yesterday, I posted the faux-tandoori chicken from last night's dinner, as well as the greens, up on Saturday's Mouse. Here's the garlic naan side dish that became the star of the show.
There are a ton of naan recipes floating around there, with wide-ranging ingredients and prep methods. I read a lot of them. Some call for just flour and water, others are more complicated. They're cooked in frying pans and on pizza stones, over open flames, etc. The goal is fast high heat.
I started with two tablespoons of warm water and a teaspoon of honey, mixed together until well incorporated and then swished in a tablespoon of yeast and waited for it to get fluffy.
 Then I added a half cup of whole wheat flour, a cup of white all purpose flour, two tablespoons of yogurt, a half a cup of milk, a pinch of salt and a half teaspoon of garlic powder. And turned on the machine.
 It was sticky. Shapeless. Un-ballable. I added a dusting of additional flour. And another dusting. I used close to two cups here, in total. It was really sticky. It was a very hot and humid day. I rolled it into a sticky and imperfect ball, covered it and left it t rise for two hours.
 I don't have a picture of the risen ball, but it fluffed up nicely. We divided it into five balls (aimed for six, got distracted).
 The dough was still super sticky at this point, so the naan-balls went on a baking sheet spritzed with olive oil and covered with a towel.
We preheated a cast iron stove-top grill to medium-high, and rolled the balls out flat. I also melted some butter with grated garlic to brush on top of these mid-way through cooking. I spritzed the grill with olive oil and laid on the naan. It sizzled immediately, and began to bubble.
The dough was still super sticky at this point, so the naan-balls went on a baking sheet spritzed with olive oil and covered with a towel.
We preheated a cast iron stove-top grill to medium-high, and rolled the balls out flat. I also melted some butter with grated garlic to brush on top of these mid-way through cooking. I spritzed the grill with olive oil and laid on the naan. It sizzled immediately, and began to bubble.
 After about two minutes, I flipped them over. The first side had nice grill marks and the whole bread was starting to feel firm. Of course, this will vary based on your cooking technique and temperature.
 After both sides have light grill marks and it feels like cooked bread, brush on the garlic butter, flip the bread butter side down and grill another 30 seconds or so...flip again, brush again, flip garlic side down and give it another 30 seconds. You want the bread to be white overall with grill marks.
 Mmm. Naan. This was super-soft and fluffy inside with the right amount of crisp on the surface and a decent chewiness.
This recipe is cross-posted at Saturday’s Mouse, where I’m working on making food out of food.
Garlic Naan
Ingredients
Mmm. Naan. This was super-soft and fluffy inside with the right amount of crisp on the surface and a decent chewiness.
This recipe is cross-posted at Saturday’s Mouse, where I’m working on making food out of food.
Garlic Naan
Ingredients
- 1 tablespoon active dry yeast
- 2 tablespoons warm water
- 1 teaspoon honey
- 2 tablespoons low fat yogurt
- 1/2 cup skim milk
- 1/2 cup whole wheat flour
- 1 1/2 cups all purpose flour (divided)
- 1 teaspoon garlic powder
- dash kosher salt
- 2 cloves garlic (minced)
- 2 tablespoons butter (melted)
- Mix water and honey until well incorporated. Add yeast and let proof 10 minutes or until foamy.
- Add in all other ingredients - being cautious with the AP flour. Start with 1 cup AP flour and add more if needed.
- Knead by hand 10 minutes or in mixer for 5-7. Form into a ball. If too sticky, add more flour.
- Cover and let rise in a warm place for 2 hours until doubled. Mix butter and garlic, and warm.
- Divide into 6 or so balls. Roll out flat, to about a quarter inch thicknesss.
- Preheat stove top grill (or actual grill). Grease grill lightly.
- Grill each flatbread for 2 minutes or so until firm with grill marks. Flip over and grill other side. Then brush each with garlic butter and grill each side for another 30 seconds or so, until soft but crispy.
Join the Co-op Today!
With a year of organizing and planning under our belts, we’re pleased to announce that we have completed the incorporation process and are now able to accept member-owner applications and equity investments! This is a huge milestone for SPFC and the result of a lot of time, hard work, volunteer hours, and dedication. Thank you to everyone who has supported us along the way.
Join us for the next stage of the journey by becoming a member-owner today! As a member-owner you are the bedrock of the co-op. You will form the vision for what goods and services the co-op offers because you own the store – quite literally. So the most important thing you can do to get this co-op open is demonstrate your support by becoming a member-owner. Your equity investment will convince banks and other funders that this is a viable business worthy of financing.
Join now by downloading the application on our website. Bring it, along with your equity investment, to one of our committee or volunteer meetings, community events, or mail both to: South Philly Food Co-op, P.O. Box 31506, Philadelphia, PA 19147.
Member-Owner Investment
Our membership investment is set at $200 (for your entire household) which can be paid in full or installments with a minimum initial payment of $25. This is not a fee, or a donation, it’s a one-time investment in the store. If you are able to contribute your full $200 equity up front, we strongly encourage you to do so.
Member Benefits
As a member owner RIGHT NOW, you are entitled to:
Share
- The opportunity to run and vote for the Board of Directors
- One vote on items up for general vote at all co-op general meetings
- Ability to petition for policy changes
- Educational Classes, Workshops
- Discounts at participating local businesses (coming soon!)
- Member-only specials and sales
- Have a say in the variety of products offered
- May receive yearly rebates based on total household purchases and the profits made by the store - these rebates, often referred to as “patronage refunds,” are issued at the discretion of the Board of Directors
- And, of course, we will continue to keep you well informed of our progress through regular emails and on our website so you know exactly how your investment is being used.
Sarah's Garden Week 5: A little surprise
Finally, some sun!
[caption id="" align="alignnone" width="500" caption="Garden on May 24"]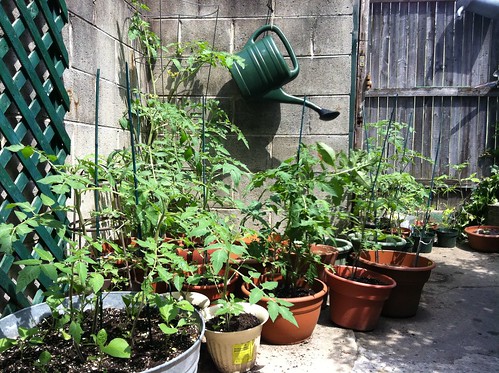 [/caption]
And what goes with sun? Sunflowers!
[caption id="" align="alignnone" width="500" caption="2 week old sunflowers"]
[/caption]
And what goes with sun? Sunflowers!
[caption id="" align="alignnone" width="500" caption="2 week old sunflowers"]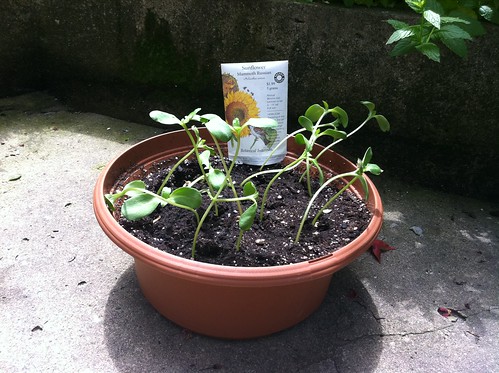 [/caption]
I started these sunflowers inside because I didn't want the rain to hurt them. But it turns out that sunflowers are pretty strong and I probably could have just planted them in the ground ("ground" being my raised bed.) Oh well. Just look at their nice roots!
[caption id="" align="alignnone" width="374" caption="Ignore my dirty fingers, please."]
[/caption]
I started these sunflowers inside because I didn't want the rain to hurt them. But it turns out that sunflowers are pretty strong and I probably could have just planted them in the ground ("ground" being my raised bed.) Oh well. Just look at their nice roots!
[caption id="" align="alignnone" width="374" caption="Ignore my dirty fingers, please."]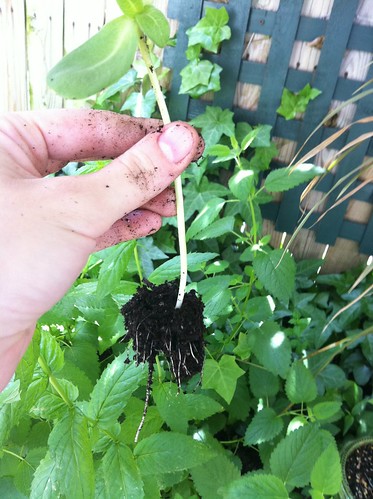 [/caption]
Along with the sunflowers I also started some summer squash inside. Again, it probably could have been sown directly in the ground but I like to baby my little seedlings. Like the sunflowers, these little ones seem pretty hardy and the leaves are a nice shade of dark green.
[caption id="" align="alignnone" width="374" caption="Again, ignore the fingers."]
[/caption]
Along with the sunflowers I also started some summer squash inside. Again, it probably could have been sown directly in the ground but I like to baby my little seedlings. Like the sunflowers, these little ones seem pretty hardy and the leaves are a nice shade of dark green.
[caption id="" align="alignnone" width="374" caption="Again, ignore the fingers."]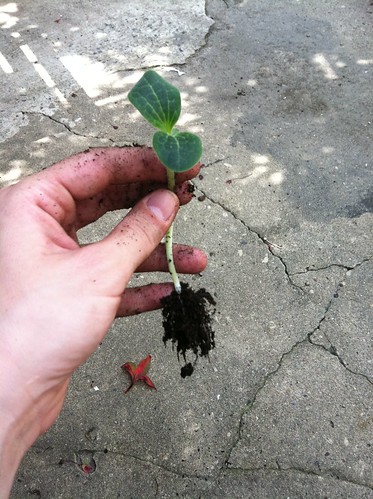 [/caption]
I don't have too much space left for plants outside (or at least space that is sunny) so here's where the sunflowers and some squash will go:
[caption id="" align="alignnone" width="374" caption="That strangely glowing thing to the right is lavender left over from last year."]
[/caption]
I don't have too much space left for plants outside (or at least space that is sunny) so here's where the sunflowers and some squash will go:
[caption id="" align="alignnone" width="374" caption="That strangely glowing thing to the right is lavender left over from last year."]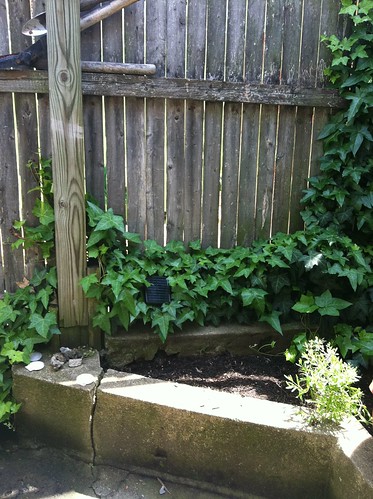 [/caption]
The rest of the squash is going to the right of that picture, to compete with the mint (just kidding, I'll help the squash out until it gets big enough to fight for itself.)
Here are some droopy, newly-planted sunflowers with a few squash:
[caption id="" align="alignnone" width="500" caption="What's that amidst the ivy? Don't worry about it."]
[/caption]
The rest of the squash is going to the right of that picture, to compete with the mint (just kidding, I'll help the squash out until it gets big enough to fight for itself.)
Here are some droopy, newly-planted sunflowers with a few squash:
[caption id="" align="alignnone" width="500" caption="What's that amidst the ivy? Don't worry about it."] [/caption]
And here's the rest of the squash
[caption id="" align="alignnone" width="500" caption="Stay back, mint!"]
[/caption]
And here's the rest of the squash
[caption id="" align="alignnone" width="500" caption="Stay back, mint!"]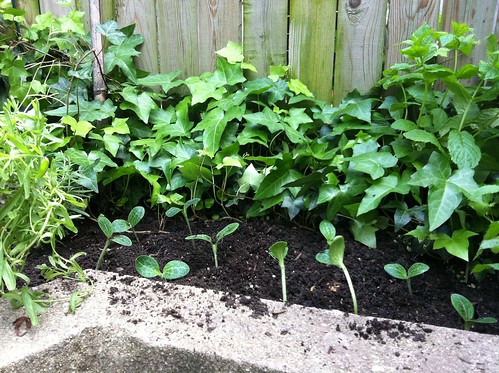 [/caption]
It's a little late to be planting squash (probably should have done it about a month ago) but I think the growing season here is long enough that it shouldn't matter too much. Here's the squash again, this time with my new little rosemary I bought at Urban Jungle on Passyunk Ave.
[caption id="" align="alignnone" width="374" caption="Squashies"]
[/caption]
It's a little late to be planting squash (probably should have done it about a month ago) but I think the growing season here is long enough that it shouldn't matter too much. Here's the squash again, this time with my new little rosemary I bought at Urban Jungle on Passyunk Ave.
[caption id="" align="alignnone" width="374" caption="Squashies"]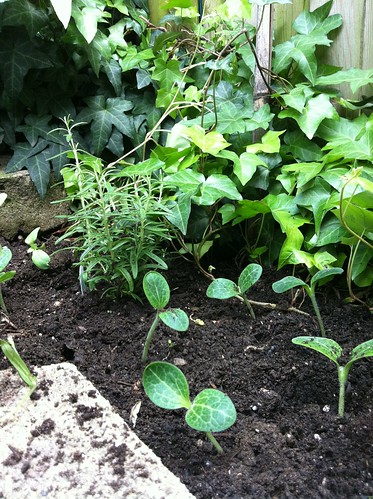 [/caption]
The rosemary was so cute and looked nice and healthy and I couldn't resist, even though I have rosemary seeds. But I would have had to have waited to plant the seeds in the fall and I wanted rosemary now, dammit. What can I say, I am prone to impatience.
Oh, hey. While I was prepping the raised bed for the squash and sunflowers (basically grabbing handfuls of dirt and worms and mixing some compost it) I found something interesting:
[caption id="" align="alignnone" width="374" caption="That's a weird-shaped rock."]
[/caption]
The rosemary was so cute and looked nice and healthy and I couldn't resist, even though I have rosemary seeds. But I would have had to have waited to plant the seeds in the fall and I wanted rosemary now, dammit. What can I say, I am prone to impatience.
Oh, hey. While I was prepping the raised bed for the squash and sunflowers (basically grabbing handfuls of dirt and worms and mixing some compost it) I found something interesting:
[caption id="" align="alignnone" width="374" caption="That's a weird-shaped rock."]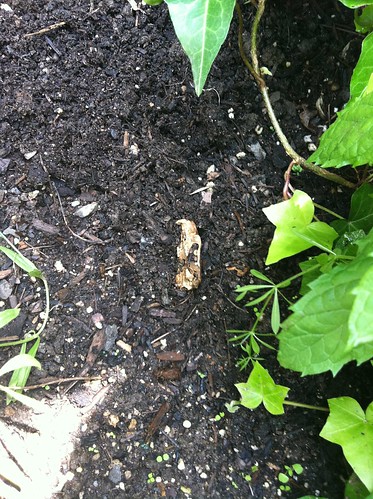 [/caption]
Hmm. Not a rock!
[caption id="" align="alignnone" width="374" caption="Skull"]
[/caption]
Hmm. Not a rock!
[caption id="" align="alignnone" width="374" caption="Skull"]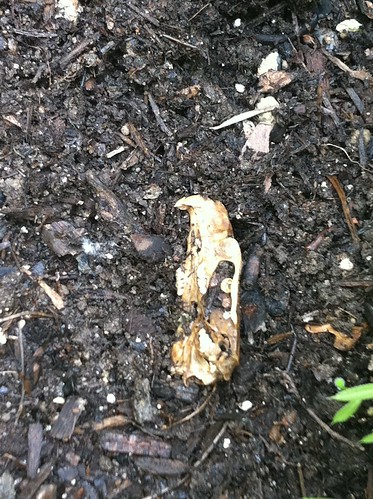 [/caption]
Some little animal skull! My picture is sadly not too great but those front teeth mean business. I probably should have mounted it on a stick as a warning to all other animals Lord of the Flies-style but it kinda freaked me out so I threw it out. I know, I know. Or I could have just kept it in there and let it fertilize the soil and decompose on its own - do skulls even do that? - but I didn't really want to come across it again. I might have screamed when I found it. Maybe.
That was the excitement for this week! Still lots of flowers on the tomatoes:
[caption id="" align="alignnone" width="374" caption="Fuzzy"]
[/caption]
Some little animal skull! My picture is sadly not too great but those front teeth mean business. I probably should have mounted it on a stick as a warning to all other animals Lord of the Flies-style but it kinda freaked me out so I threw it out. I know, I know. Or I could have just kept it in there and let it fertilize the soil and decompose on its own - do skulls even do that? - but I didn't really want to come across it again. I might have screamed when I found it. Maybe.
That was the excitement for this week! Still lots of flowers on the tomatoes:
[caption id="" align="alignnone" width="374" caption="Fuzzy"]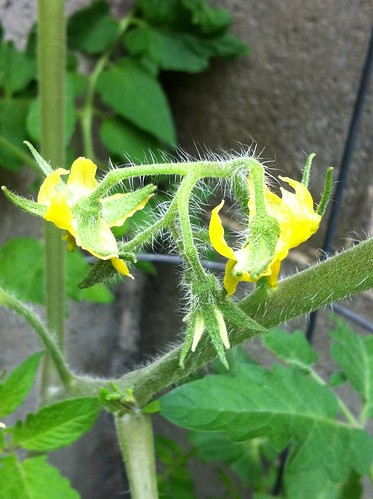 [/caption]
And, well, lots of tomato plants:
[caption id="" align="alignnone" width="374" caption="A veritable tomato forest!"]
[/caption]
And, well, lots of tomato plants:
[caption id="" align="alignnone" width="374" caption="A veritable tomato forest!"]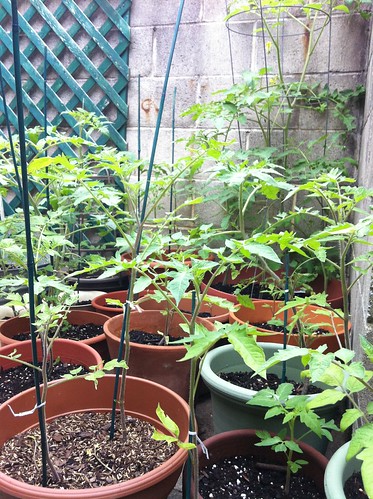 [/caption]
My grandmother warned me that some of the flowers might fall off the tomatoes without any fruit but I think that's okay because there are many, many flowers now.
I'm going away this weekend so I'm kind of hoping it rains here a bit. If not, though, I've got a backup waterer. Thank you!
Sarah DeGiorgis has lived in Philly for five years and is finally starting to feel like a true Philadelphian, though she still detests cheesesteaks. She enjoys reading, watching bad tv, eating and cooking good food and digging in the dirt. Catch up with her continuing efforts to grow food in South Philly by clicking here.
[/caption]
My grandmother warned me that some of the flowers might fall off the tomatoes without any fruit but I think that's okay because there are many, many flowers now.
I'm going away this weekend so I'm kind of hoping it rains here a bit. If not, though, I've got a backup waterer. Thank you!
Sarah DeGiorgis has lived in Philly for five years and is finally starting to feel like a true Philadelphian, though she still detests cheesesteaks. She enjoys reading, watching bad tv, eating and cooking good food and digging in the dirt. Catch up with her continuing efforts to grow food in South Philly by clicking here.
Share
[/caption]
And what goes with sun? Sunflowers!
[caption id="" align="alignnone" width="500" caption="2 week old sunflowers"][/caption]
I started these sunflowers inside because I didn't want the rain to hurt them. But it turns out that sunflowers are pretty strong and I probably could have just planted them in the ground ("ground" being my raised bed.) Oh well. Just look at their nice roots!
[caption id="" align="alignnone" width="374" caption="Ignore my dirty fingers, please."][/caption]
Along with the sunflowers I also started some summer squash inside. Again, it probably could have been sown directly in the ground but I like to baby my little seedlings. Like the sunflowers, these little ones seem pretty hardy and the leaves are a nice shade of dark green.
[caption id="" align="alignnone" width="374" caption="Again, ignore the fingers."][/caption]
I don't have too much space left for plants outside (or at least space that is sunny) so here's where the sunflowers and some squash will go:
[caption id="" align="alignnone" width="374" caption="That strangely glowing thing to the right is lavender left over from last year."][/caption]
The rest of the squash is going to the right of that picture, to compete with the mint (just kidding, I'll help the squash out until it gets big enough to fight for itself.)
Here are some droopy, newly-planted sunflowers with a few squash:
[caption id="" align="alignnone" width="500" caption="What's that amidst the ivy? Don't worry about it."][/caption]
And here's the rest of the squash
[caption id="" align="alignnone" width="500" caption="Stay back, mint!"][/caption]
It's a little late to be planting squash (probably should have done it about a month ago) but I think the growing season here is long enough that it shouldn't matter too much. Here's the squash again, this time with my new little rosemary I bought at Urban Jungle on Passyunk Ave.
[caption id="" align="alignnone" width="374" caption="Squashies"][/caption]
The rosemary was so cute and looked nice and healthy and I couldn't resist, even though I have rosemary seeds. But I would have had to have waited to plant the seeds in the fall and I wanted rosemary now, dammit. What can I say, I am prone to impatience.
Oh, hey. While I was prepping the raised bed for the squash and sunflowers (basically grabbing handfuls of dirt and worms and mixing some compost it) I found something interesting:
[caption id="" align="alignnone" width="374" caption="That's a weird-shaped rock."][/caption]
Hmm. Not a rock!
[caption id="" align="alignnone" width="374" caption="Skull"][/caption]
Some little animal skull! My picture is sadly not too great but those front teeth mean business. I probably should have mounted it on a stick as a warning to all other animals Lord of the Flies-style but it kinda freaked me out so I threw it out. I know, I know. Or I could have just kept it in there and let it fertilize the soil and decompose on its own - do skulls even do that? - but I didn't really want to come across it again. I might have screamed when I found it. Maybe.
That was the excitement for this week! Still lots of flowers on the tomatoes:
[caption id="" align="alignnone" width="374" caption="Fuzzy"][/caption]
And, well, lots of tomato plants:
[caption id="" align="alignnone" width="374" caption="A veritable tomato forest!"][/caption]
My grandmother warned me that some of the flowers might fall off the tomatoes without any fruit but I think that's okay because there are many, many flowers now.
I'm going away this weekend so I'm kind of hoping it rains here a bit. If not, though, I've got a backup waterer. Thank you!
Sarah DeGiorgis has lived in Philly for five years and is finally starting to feel like a true Philadelphian, though she still detests cheesesteaks. She enjoys reading, watching bad tv, eating and cooking good food and digging in the dirt. Catch up with her continuing efforts to grow food in South Philly by clicking here.
Tips for using up your CSA goodies. Sign up for a CSA today!
No doubt about it, market season is here, and sign-up deadlines are fast-approaching for community produce shares. CSA, or Community-Supported Agriculture, is a model of food distribution where community members pledge their support to a local farm by purchasing a share. Boxes of produce are picked up weekly or every other week by customers, and usually contain a variety of in-season vegetables, fruit, herbs, and in some cases, dairy and meat products. Participation in CSAs not only boosts the local economy, but also saves the consumer money on produce in the long run, according to research from the Center for Integrated Agricultural Systems at the University of Wisconsin-Madison. Despite these benefits, many are still hesitant to sign up for CSAs for fear of wasting precious produce they feel they might not be able to eat within a week’s time.
Below are some ideas that will help you use up all your weekly goodies before your next pick-up.
Kebab night - This is something I used to do when I was new to farmers market shopping. The night before going to the farmers market was reserved for kebabs, so I could use all the leftover produce on hand. Slice up any extra squash, onion, pepper, really any produce will do, and skewer them up. Cover the assembled kebabs in whatever seasoning suits your fancy (I usually sprinkle on some cayenne pepper for a kick), line them up on the grill, or place on a foil-lined baking sheet and roast on 350 for 10-15 minutes, rotating periodically. You can vary this recipe by adding pieces of chicken, shrimp, or other meats. Now, you’re clean out of produce and ready to stock up at the stand the next day.
Crock-pot - Truth be told, I was a little afraid of the crock-pot until recently. Being a vegetarian, I assumed this was a kitchen appliance reserved for slow-cooking meat dishes, but a little research proved me quite wrong. Stews and soups can be slow-cooked in the crock pot with any starchy vegetables, like potatoes, and greens that will add density and flavor, such as cabbage, leeks, and onions. Below are two crock pot recipes that are quick and easy. Crock-pot recipes usually yield a lot of servings, so put a few portions in the fridge, pack up the rest in Tupperware, and freeze it until you’re ready to eat. One of my favorite crock-pot recipes is Sweet Potato Lentil Stew. Here’s another for Easy Italian Chicken.
Smoothies - Smoothies aren’t usually the first thing to come to mind when you’re pondering what to do with your leftover spinach and kale, but it really is a tasty way to get your daily dose of greens. Adding fruit masks the taste of the greens, and you’re getting your daily dose of vitamins and minerals to boot!
A favorite recipe:
In the blender add:
Share
- 1 banana, cut into 4 or 5 pieces—I find it blends easier this way
- A few handfuls of whatever frozen fruit you desire—try mango, pineapple, or berries
- Several leaves of kale (no stems), or handfuls of spinach, or both
- Sprinkling of coconut
- Blend
Sticking around this weekend? Try The Food For All Collective Spring Potluck
 The Food For All Collective (TFFAC) is "a collectively-run bulk food buying club that seeks to make humane and sustainable choices accessible to everyone." Some of the Co-op organizers have been involved with TFFAC for a while and have participated in their bulk food orders. In our household, for example, Alison often orders from them and we are currently enjoying, among other items, several pounds of organic, fair trade coffee beans through TFFAC.
TFFAC is different from a Co-op in many ways but philosophically we're all in tune with the desire to bring good food to as many people as possible.
To that end, they are hosting their first ever Spring Potluck on Sunday, May 29 from 1pm to 4pm at Jefferson Square Park (Washington Ave between 3rd and 4th Street). Rain date will be announced if necessary.
Please visit the Facebook event page for the potluck to RSVP and for more information.
The Food For All Collective (TFFAC) is "a collectively-run bulk food buying club that seeks to make humane and sustainable choices accessible to everyone." Some of the Co-op organizers have been involved with TFFAC for a while and have participated in their bulk food orders. In our household, for example, Alison often orders from them and we are currently enjoying, among other items, several pounds of organic, fair trade coffee beans through TFFAC.
TFFAC is different from a Co-op in many ways but philosophically we're all in tune with the desire to bring good food to as many people as possible.
To that end, they are hosting their first ever Spring Potluck on Sunday, May 29 from 1pm to 4pm at Jefferson Square Park (Washington Ave between 3rd and 4th Street). Rain date will be announced if necessary.
Please visit the Facebook event page for the potluck to RSVP and for more information.
Delicious Tomato-Rice-Feta for Spring!
Here a simple and tasty kind of Mediterranean recipe. Try it and the sun will shine for you - at least in your belly. :)
[caption id="attachment_1325" align="aligncenter" width="225" caption="Tomato Rice Feta (for 2 people)"] [/caption]
Tomato-Rice-Feta dish (for 2 people)
You need:
[/caption]
Tomato-Rice-Feta dish (for 2 people)
You need:
Share
 [/caption]
Tomato-Rice-Feta dish (for 2 people)
You need:
[/caption]
Tomato-Rice-Feta dish (for 2 people)
You need:
- 1/2 onion
- 2-3 tomatoes
- 6 mushrooms
- vegetable or chicken broth
- 1 cup of rice (basmati works the best)
- feta cheese (Trader Joes-Israeli feta)
- cilantro
- Cook rice.
- Cut the onions and fry them in a pan.
- Add tomatoes and mushroom, cook for 5 min, add broth and let simmer for another 5 min.
- Add rice and cook on low for 5 min.
- Cut feta cheese into little blocks and stick them into the rice mixture. Cover the pan so the feta cheese can get soft; let it sim for another 10 minutes.
- For decoration add cilantro or parsley.
No Knead
A few years ago I became really interested in making my own bread. I received this beautiful book from a friend and was compelled to try every recipe, well, except for puff pastry. But the cinnamon rolls, challah, and dark pumpernickel-raisin bread - they were delicious and I was hooked. There is something so satisfying about the end result.
But homemade bread is a lot of work and when life picks up and I don't have time to wait on several rounds of rising dough, I turn to "No-Knead" bread. I'm sure you've heard about it by now, the master recipe was written up years ago in the New York Times and featured over and over again on the internet and Mother Earth News magazine (which is where I discovered it). But if you haven't actually tried making it yet, I highly recommend it. It's tasty and rewarding, crusty on the outside and chewy on the inside. And the best part is that it's easy. Here's the recipe and what I do.
Recipe: No-Knead Bread
Adapted from Jim Lahey, Sullivan Street Bakery

 (The next day when we get home from work, around 4pm) 2. Dough is ready when its surface is dotted with bubbles. Lightly flour a work surface and place dough on it; sprinkle it with a little more flour and fold it over on itself once or twice. Cover loosely with plastic wrap and let rest about 15 minutes.
 3. Using just enough flour to keep dough from sticking to work surface or to your fingers, gently and quickly shape dough into a ball. Generously coat a cotton towel (not terry cloth) with flour, wheat bran or cornmeal; put dough seam side down on towel and dust with more flour, bran or cornmeal. Cover with another cotton towel and let rise for about 2 hours. When it is ready, dough will be more than double in size and will not readily spring back when poked with a finger.
 (Around 6pm) 4. At least a half-hour before dough is ready, heat oven to 450 degrees. Put a 6- to 8-quart heavy covered pot (cast iron, enamel, Pyrex or ceramic) in oven as it heats. When dough is ready, carefully remove pot from oven. Slide your hand under towel and turn dough over into pot, seam side up; it may look like a mess, but that's O.K. Shake pan once or twice if dough is unevenly distributed; it will straighten out as it bakes. Cover with lid and bake 30 minutes, then remove lid and bake another 15 to 30 minutes, until loaf is beautifully browned.
 Let it cool on a wire rack - if you can wait (I usually can't).
 My favorite summer dinner - a salad and homemade bread with butter, radishes and sea salt.
If you are intrigued by this no-knead method, but aren't a fan of white flour, I highly recommend buying Jeff Hertzberg and Zoë François’s book Healthy Bread in Five Minutes a Day because they provide healthy recipes made with less white flour, lower refined sugars and gluten free options. I should also mention that the Fair Food Farm Stand in the Terminal Market sells a variety of different flours.
Try it this weekend!
My favorite summer dinner - a salad and homemade bread with butter, radishes and sea salt.
If you are intrigued by this no-knead method, but aren't a fan of white flour, I highly recommend buying Jeff Hertzberg and Zoë François’s book Healthy Bread in Five Minutes a Day because they provide healthy recipes made with less white flour, lower refined sugars and gluten free options. I should also mention that the Fair Food Farm Stand in the Terminal Market sells a variety of different flours.
Try it this weekend!
Share
- 3 cups all-purpose or bread flour, more for dusting
- ¼ teaspoon instant yeast
- 1¼ teaspoons salt
- Cornmeal or wheat bran as needed

 (The next day when we get home from work, around 4pm) 2. Dough is ready when its surface is dotted with bubbles. Lightly flour a work surface and place dough on it; sprinkle it with a little more flour and fold it over on itself once or twice. Cover loosely with plastic wrap and let rest about 15 minutes.
 3. Using just enough flour to keep dough from sticking to work surface or to your fingers, gently and quickly shape dough into a ball. Generously coat a cotton towel (not terry cloth) with flour, wheat bran or cornmeal; put dough seam side down on towel and dust with more flour, bran or cornmeal. Cover with another cotton towel and let rise for about 2 hours. When it is ready, dough will be more than double in size and will not readily spring back when poked with a finger.
 (Around 6pm) 4. At least a half-hour before dough is ready, heat oven to 450 degrees. Put a 6- to 8-quart heavy covered pot (cast iron, enamel, Pyrex or ceramic) in oven as it heats. When dough is ready, carefully remove pot from oven. Slide your hand under towel and turn dough over into pot, seam side up; it may look like a mess, but that's O.K. Shake pan once or twice if dough is unevenly distributed; it will straighten out as it bakes. Cover with lid and bake 30 minutes, then remove lid and bake another 15 to 30 minutes, until loaf is beautifully browned.
 Let it cool on a wire rack - if you can wait (I usually can't).
 My favorite summer dinner - a salad and homemade bread with butter, radishes and sea salt.
If you are intrigued by this no-knead method, but aren't a fan of white flour, I highly recommend buying Jeff Hertzberg and Zoë François’s book Healthy Bread in Five Minutes a Day because they provide healthy recipes made with less white flour, lower refined sugars and gluten free options. I should also mention that the Fair Food Farm Stand in the Terminal Market sells a variety of different flours.
Try it this weekend!
My favorite summer dinner - a salad and homemade bread with butter, radishes and sea salt.
If you are intrigued by this no-knead method, but aren't a fan of white flour, I highly recommend buying Jeff Hertzberg and Zoë François’s book Healthy Bread in Five Minutes a Day because they provide healthy recipes made with less white flour, lower refined sugars and gluten free options. I should also mention that the Fair Food Farm Stand in the Terminal Market sells a variety of different flours.
Try it this weekend!
Sarah's Garden Week 4: Growing!
Hello again! There has been exciting progress this past week. First, here's the garden:
[caption id="" align="alignnone" width="500" caption="As of May 19"]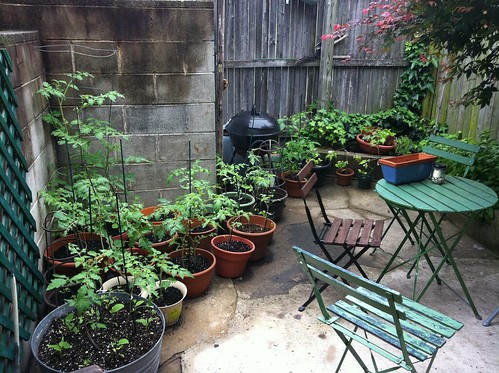 [/caption]
And now...flowers!
[caption id="" align="alignnone" width="374" caption="See them?"]
[/caption]
And now...flowers!
[caption id="" align="alignnone" width="374" caption="See them?"]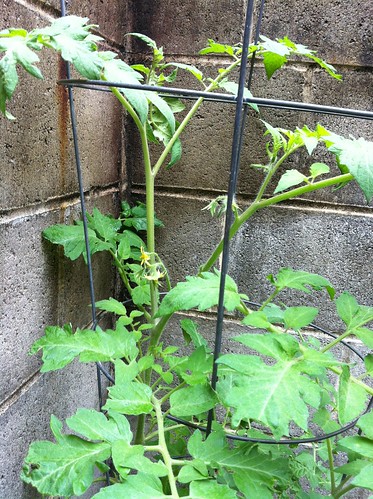 [/caption]
[caption id="" align="alignnone" width="374" caption="There they are!"]
[/caption]
[caption id="" align="alignnone" width="374" caption="There they are!"]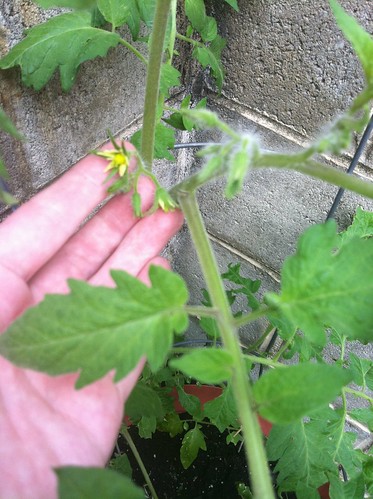 [/caption]
Those are both from the same plant, my monster beefsteak that has always been the biggest one. (I think it needs a name...Beefy?) But the other beefsteaks are getting flowers, too!
[caption id="" align="alignnone" width="374" caption="Pretty"]
[/caption]
Those are both from the same plant, my monster beefsteak that has always been the biggest one. (I think it needs a name...Beefy?) But the other beefsteaks are getting flowers, too!
[caption id="" align="alignnone" width="374" caption="Pretty"]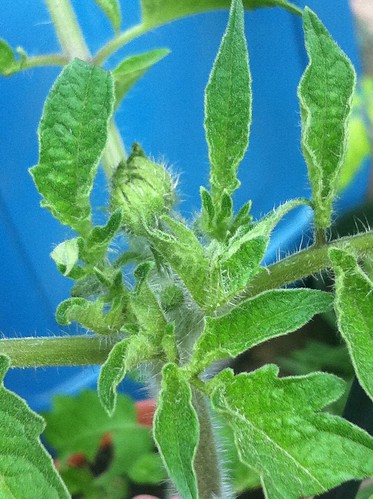 [/caption]
Flowers are exciting because flowers mean fruit. Hopefully good-tasting fruit. Gotta wait and see!
[caption id="" align="alignnone" width="500" caption="Good Beefy"]
[/caption]
Flowers are exciting because flowers mean fruit. Hopefully good-tasting fruit. Gotta wait and see!
[caption id="" align="alignnone" width="500" caption="Good Beefy"]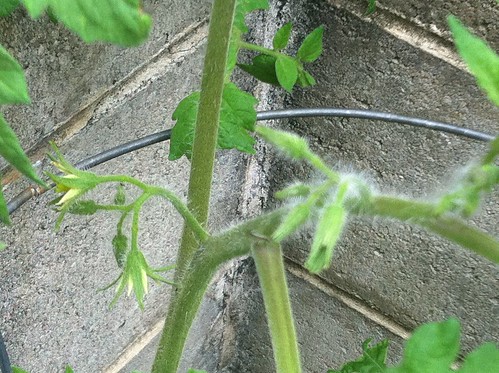 [/caption]
It's been raining since Saturday so I haven't had to water at all and I'm hoping for some sunny days this weekend so everything doesn't get too waterlogged. But the rain has been, for the most part, light and frequent which is how watering should work anyway, so I'm actually kind of thankful for it.
I realize I've been focusing largely on the beefsteak tomatoes because they're the biggest, but the beauty queens are getting larger and I'll do a closer look at them in the coming weeks. The eggplants are still pretty small but I think it's still a bit cold for them. They apparently do well in hot weather, so once we actually start getting summerish weather I think they'll be happier.
On Sunday the rain gave us a bit of a break, so I went outside and retied some of the tomatoes to their stakes and did some weeding. Now containers usually don't need too much weeding since you use new soil each time, but my big metal planter has had soil in in for a while and look! Little weeds:
[caption id="" align="alignnone" width="500" caption="Just ignore the misshapen eggplant"]
[/caption]
It's been raining since Saturday so I haven't had to water at all and I'm hoping for some sunny days this weekend so everything doesn't get too waterlogged. But the rain has been, for the most part, light and frequent which is how watering should work anyway, so I'm actually kind of thankful for it.
I realize I've been focusing largely on the beefsteak tomatoes because they're the biggest, but the beauty queens are getting larger and I'll do a closer look at them in the coming weeks. The eggplants are still pretty small but I think it's still a bit cold for them. They apparently do well in hot weather, so once we actually start getting summerish weather I think they'll be happier.
On Sunday the rain gave us a bit of a break, so I went outside and retied some of the tomatoes to their stakes and did some weeding. Now containers usually don't need too much weeding since you use new soil each time, but my big metal planter has had soil in in for a while and look! Little weeds:
[caption id="" align="alignnone" width="500" caption="Just ignore the misshapen eggplant"]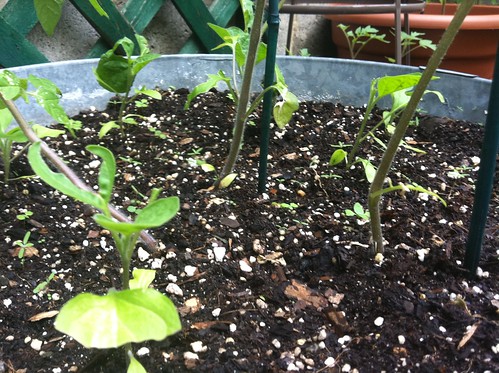 [/caption]
So I pulled those little buggers out, trying to get as many of the roots as possible.
[caption id="" align="alignnone" width="374" caption="Roots"]
[/caption]
So I pulled those little buggers out, trying to get as many of the roots as possible.
[caption id="" align="alignnone" width="374" caption="Roots"]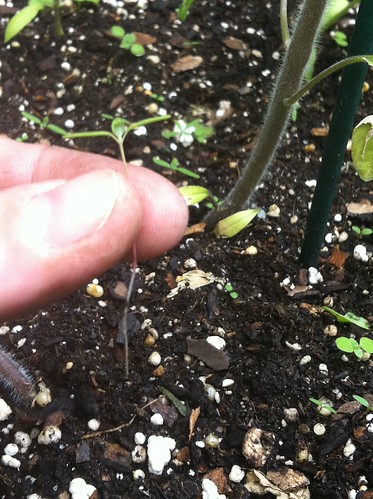 [/caption]
And now my tomatoes and eggplants can grow undisturbed (you hear that, eggplant?)
While I was weeding, I debated whether I should take the little lower branches and the suckers (that's the actual term, I'm not making stuff up this time) off some of the larger tomato plants. Suckers are the little shoots that grow from the intersection of the main stem and branches of the tomato plant, and I've been told both to prune them and to leave them on. Basically it comes down the this: if you do take those suckers off (ha), the remaining branches get more nutrients and therefore produce bigger fruit. But if you leave them on you'll get more fruit, though it might be smaller. If you have a short growing season you probably want to take them off since they'll take nutrients from the rest of the plant and probably not mature in time to produce fruit. They also tend to make the plant top-heavy, so if you're growing in a small space (yup) they might get too unwieldy. What to do?? I eventually compromised by pruning some plants and leaving the others undisturbed. Since then I've decided that I'm going to leave the majority of them on since it's only May and the growing season here is quite long. If things get too top-heavy then I'll reassess.
[caption id="" align="alignnone" width="374" caption="Another shot of the garden...cause I felt like it"]
[/caption]
And now my tomatoes and eggplants can grow undisturbed (you hear that, eggplant?)
While I was weeding, I debated whether I should take the little lower branches and the suckers (that's the actual term, I'm not making stuff up this time) off some of the larger tomato plants. Suckers are the little shoots that grow from the intersection of the main stem and branches of the tomato plant, and I've been told both to prune them and to leave them on. Basically it comes down the this: if you do take those suckers off (ha), the remaining branches get more nutrients and therefore produce bigger fruit. But if you leave them on you'll get more fruit, though it might be smaller. If you have a short growing season you probably want to take them off since they'll take nutrients from the rest of the plant and probably not mature in time to produce fruit. They also tend to make the plant top-heavy, so if you're growing in a small space (yup) they might get too unwieldy. What to do?? I eventually compromised by pruning some plants and leaving the others undisturbed. Since then I've decided that I'm going to leave the majority of them on since it's only May and the growing season here is quite long. If things get too top-heavy then I'll reassess.
[caption id="" align="alignnone" width="374" caption="Another shot of the garden...cause I felt like it"]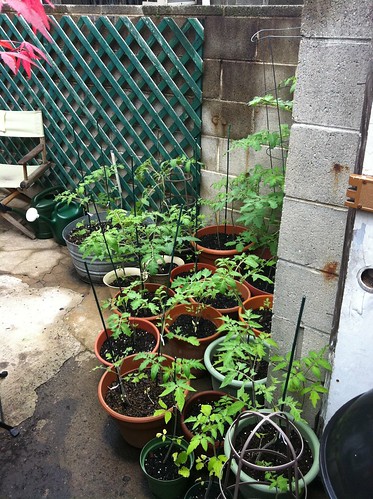 [/caption]
The plan for this weekend is to plant some of the basil outside, since it's getting quite crowded in its little indoors pot:
[caption id="" align="alignnone" width="374" caption="Excuse my thumb"]
[/caption]
The plan for this weekend is to plant some of the basil outside, since it's getting quite crowded in its little indoors pot:
[caption id="" align="alignnone" width="374" caption="Excuse my thumb"]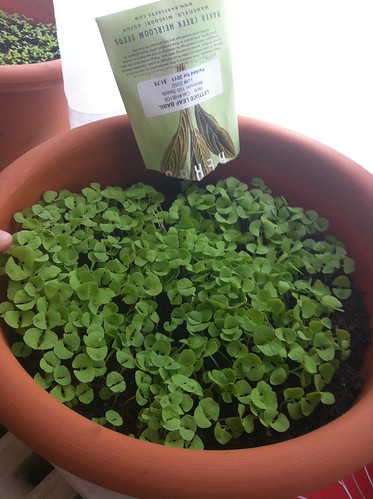 [/caption]
I know it hasn't reached the two-sets-of-leaves phase, so maybe I'll just thin it out a bit since I actually don't need 40+ basil plants. Maybe one of my dedicated readers wants some? Let me know!
One little basil also somehow crept in to my feverfew...
[caption id="" align="alignnone" width="374" caption="See it?"]
[/caption]
I know it hasn't reached the two-sets-of-leaves phase, so maybe I'll just thin it out a bit since I actually don't need 40+ basil plants. Maybe one of my dedicated readers wants some? Let me know!
One little basil also somehow crept in to my feverfew...
[caption id="" align="alignnone" width="374" caption="See it?"]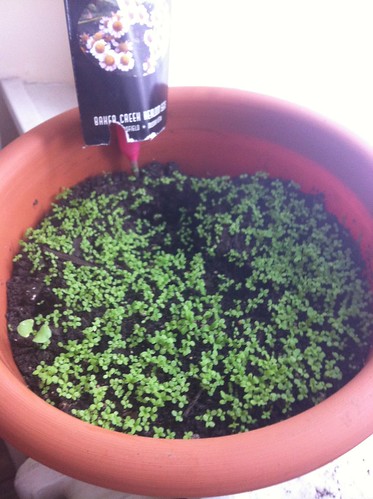 [/caption]
Don't know how that happened.
[caption id="" align="alignnone" width="374" caption="Traitor!"]
[/caption]
Don't know how that happened.
[caption id="" align="alignnone" width="374" caption="Traitor!"]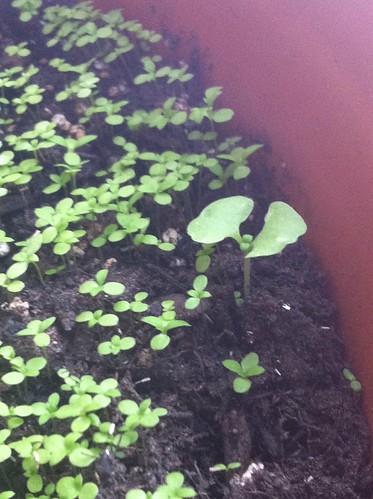 [/caption]
As always, I'll be back next week.
Sarah DeGiorgis has lived in Philly for five years and is finally starting to feel like a true Philadelphian, though she still detests cheesesteaks. She enjoys reading, watching bad tv, eating and cooking good food and digging in the dirt. Catch up with her continuing efforts to grow food in South Philly by clicking here.
[/caption]
As always, I'll be back next week.
Sarah DeGiorgis has lived in Philly for five years and is finally starting to feel like a true Philadelphian, though she still detests cheesesteaks. She enjoys reading, watching bad tv, eating and cooking good food and digging in the dirt. Catch up with her continuing efforts to grow food in South Philly by clicking here.
Share
[/caption]
And now...flowers!
[caption id="" align="alignnone" width="374" caption="See them?"][/caption]
[caption id="" align="alignnone" width="374" caption="There they are!"][/caption]
Those are both from the same plant, my monster beefsteak that has always been the biggest one. (I think it needs a name...Beefy?) But the other beefsteaks are getting flowers, too!
[caption id="" align="alignnone" width="374" caption="Pretty"][/caption]
Flowers are exciting because flowers mean fruit. Hopefully good-tasting fruit. Gotta wait and see!
[caption id="" align="alignnone" width="500" caption="Good Beefy"][/caption]
It's been raining since Saturday so I haven't had to water at all and I'm hoping for some sunny days this weekend so everything doesn't get too waterlogged. But the rain has been, for the most part, light and frequent which is how watering should work anyway, so I'm actually kind of thankful for it.
I realize I've been focusing largely on the beefsteak tomatoes because they're the biggest, but the beauty queens are getting larger and I'll do a closer look at them in the coming weeks. The eggplants are still pretty small but I think it's still a bit cold for them. They apparently do well in hot weather, so once we actually start getting summerish weather I think they'll be happier.
On Sunday the rain gave us a bit of a break, so I went outside and retied some of the tomatoes to their stakes and did some weeding. Now containers usually don't need too much weeding since you use new soil each time, but my big metal planter has had soil in in for a while and look! Little weeds:
[caption id="" align="alignnone" width="500" caption="Just ignore the misshapen eggplant"][/caption]
So I pulled those little buggers out, trying to get as many of the roots as possible.
[caption id="" align="alignnone" width="374" caption="Roots"][/caption]
And now my tomatoes and eggplants can grow undisturbed (you hear that, eggplant?)
While I was weeding, I debated whether I should take the little lower branches and the suckers (that's the actual term, I'm not making stuff up this time) off some of the larger tomato plants. Suckers are the little shoots that grow from the intersection of the main stem and branches of the tomato plant, and I've been told both to prune them and to leave them on. Basically it comes down the this: if you do take those suckers off (ha), the remaining branches get more nutrients and therefore produce bigger fruit. But if you leave them on you'll get more fruit, though it might be smaller. If you have a short growing season you probably want to take them off since they'll take nutrients from the rest of the plant and probably not mature in time to produce fruit. They also tend to make the plant top-heavy, so if you're growing in a small space (yup) they might get too unwieldy. What to do?? I eventually compromised by pruning some plants and leaving the others undisturbed. Since then I've decided that I'm going to leave the majority of them on since it's only May and the growing season here is quite long. If things get too top-heavy then I'll reassess.
[caption id="" align="alignnone" width="374" caption="Another shot of the garden...cause I felt like it"][/caption]
The plan for this weekend is to plant some of the basil outside, since it's getting quite crowded in its little indoors pot:
[caption id="" align="alignnone" width="374" caption="Excuse my thumb"][/caption]
I know it hasn't reached the two-sets-of-leaves phase, so maybe I'll just thin it out a bit since I actually don't need 40+ basil plants. Maybe one of my dedicated readers wants some? Let me know!
One little basil also somehow crept in to my feverfew...
[caption id="" align="alignnone" width="374" caption="See it?"][/caption]
Don't know how that happened.
[caption id="" align="alignnone" width="374" caption="Traitor!"][/caption]
As always, I'll be back next week.
Sarah DeGiorgis has lived in Philly for five years and is finally starting to feel like a true Philadelphian, though she still detests cheesesteaks. She enjoys reading, watching bad tv, eating and cooking good food and digging in the dirt. Catch up with her continuing efforts to grow food in South Philly by clicking here.
Veggies Parmesan


- 1 Eggplant, sliced thin
- 1 Zucchini, sliced thin
- 1 Yellow Squash, sliced thin
- 4 cups Panko breadcrumbs
- 3 cups Pasta sauce
- 1 cup Parmesan cheese, grated
- 2 Eggs
- 1/4 cup Milk
- 1 teaspoon red pepper flakes
- 1 teaspoon dried oregano
- 1 teaspoon dried basil
- 1/4 teaspoon kosher salt
- 1/2 teaspoon black pepper
- Preheat oven to 400.
- Beat eggs together with milk (Non-dairy milk is fine here, as long as it's unsweetened). Prepare breadcrumbs in a shallow dish. Mix with herbs.
- Dip sliced veggies into egg, shake to remove excess and then coat in breadcrumbs.
- Lay on baking sheet lined with a silicone mat, or covered with foil or parchment.
- Bake 20 minutes at 400, flipping once midway through. Aim for crispy and somewhat golden.
- Turn oven down to 350.
- Coat the bottom of a baking dish with sauce.
- Add a layer of breaded veggies, arranging for complete coverage without gaps.
- Top with cheese and sauce, layer again.
- The top layer should be breaded veg covered in cheese. Tent with foil.
- Bake 25 minutes at 350.
- Remove foil and bake another 10 minutes to melt cheese.
Your South Philly yard as an ecosystem
Every 3rd Monday of the month, the group Transition Philadelphia (the local arm of "a movement of people making their communities more resilient in the face of peak oil, climate change and plain old economic hard times") hosts educational events that seek to inform about how to prepare our homes and neighborhoods for the end of cheap fossil fuels.
Tonight's event is about permaculture or, as their website puts it:
Share
...learning to modify natural, self-contained ecosystems to produce a yield for us to eat while at the same time continually enhancing soil fertility and biodiversity, and managing food forests of perennial plants, familiar and newGo to Transition Philadelphia's website for more info on the program (a short film with a guest speaker) and how to RSVP. Event begins at 6:30pm with a potluck dinner and main program starts at 7. I've actually just started learning about permaculture over the past few weeks and am therefore a bit disappointed that I can't make it tonight at the South Philly Older Adults Center (northwest corner of E. Passyunk Ave. and Dickinson Street). In fact, not to tread on Sarah's beat, Alison and I finished planting our garden this weekend taking special care to include plenty of flowering annuals and some perennials (a new butterfly bush, for example) that will, in theory, attract pollinators and predators to fertilize our tomatoes, cucumbers and zucchini while protecting them from the white flies, black flies and worms that we had last year. And, unlike last year when our garden was almost all green, we have some great purples, reds and yellows going on (pictures to follow if everything we planted actually takes hold and thrives). Though not exactly permaculture since we didn't plant in such a way to keep us from having to add nutrients to our soil from compost, it is an ecosystem in the making. (Now, if only those good bugs can find their way to us!) So if you're interested in figuring out how to take that bare patch of concrete behind your house and turn it into a self-supporting ecosystem, tonight's event is for you.