
Garlic Ginger Seitan Lettuce Wraps
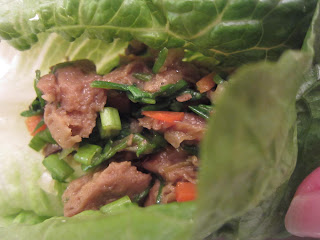
There are a lot of ways to get food into your face. A fork, for example, is pretty classic. But forks don’t taste particularly good, and they can hurt your teeth. So we move on to things like fingers, which can be a mess, and again, painful. But bread and tortillas are pretty handy. So is lettuce. I forget about lettuce wraps sometimes. Lettuce wraps are ideal for spring, I think, because they give you a vehicle for moving food from plate to face without overwhelming whatever bright fresh flavors are in your dinner. Plus, the lettuce is pretty good right now.
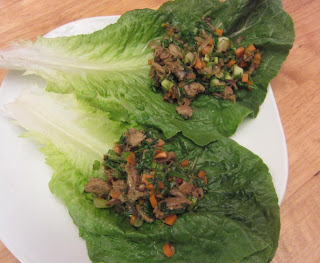
Also, everyone I know is getting married right now. Friends were married this past weekend and more friends will be married this coming weekend. This happened a hundred years ago too, but I was part of everyone then. Now, it seems like every other week someone is announcing an engagement or having a wedding. The first time I had lettuce wraps was on my honeymoon, a hundred years ago, in some fake-fancy themed restaurant in Las Vegas. So maybe that’s why we went for it tonight. I think it was Sous Chef Brian’s idea.
These are seitan lettuce wraps, and they’re vegan and delicious, but you could do the exact same thing with chicken and please the meat people. It’s also – like an egg roll, or a lasagna – a great way to use up whatever’s hanging around the fridge.

I started by marinating my seitan. You could so whatever fun sauce comes to mind, but this is just tamari and mirin, equal parts. Let that sit and get to the veg.

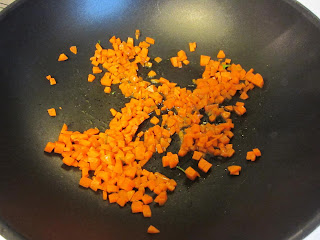
The veg go in order of cooking time, because we’re stir frying and some things need more time. I have carrots today, so they need a head start. Carrots, diced small, in a tablespoon of oil (I used safflower, but use what makes you happy), over high heat.
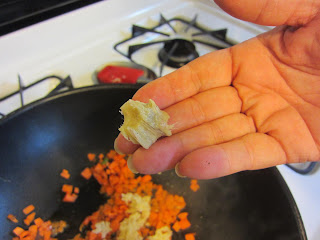
Give them a minute to soften, and just a minute, and dial it down to medium and hit it with some ginger and garlic.
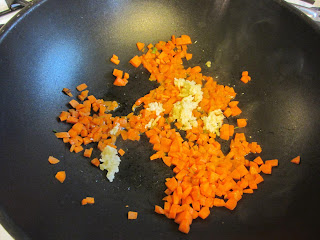
What other veg do you have, and how long do they need to cook? If it was bell pepper time, some red peppers would be great, again, minced small, but really, what you have will be great. I had a few stray mushrooms, and some claytonia, and scallions (there has to be some sort of onion, I think).
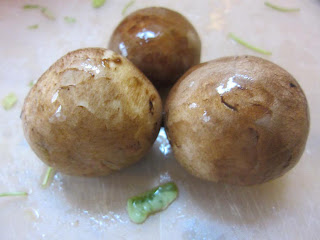
The claytonia just needs to wilt, and the scallions go on at the end, so I added my seitan and mushrooms. The marinade from the seitan went in too, and I used a spatula to hack at the larger pieces of seitan. I wasn’t aiming for minced, but this had to fold neatly into lettuce.

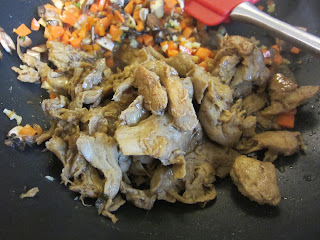
Once the seitan was warmed through and those carrots were really ready to go,

I added the claytonia. It subbed well for sprouts, but sprouts would be great here. Flipped that a few times to wilt, and then turned the heat off and added the scallions. Also, a quick drizzle of toasted sesame oil and a sprinkle of red pepper flake (to taste).


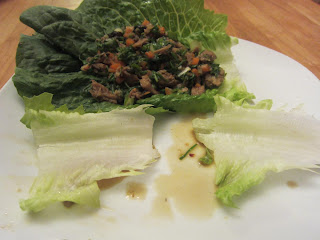
That’s it, all you need to do now is wash and dry some large lettuce leaves and make it a taco. Last week I had some awesome local bibb lettuce, but this week all I had handy was spring mix and spinach, so I sent my spouse out to The Grocery Store and the best they could do for us was romaine. Romaine is fine, way better than spring mix, for this, but if you can get some butter lettuce or bibb, you’ll be doing alright.

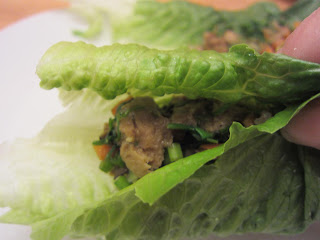
Pro tip: If you are using romaine, break off the crispier stems and you'll have a much more foldable wrap.
This recipe is cross-posted at Saturday’s Mouse, where I’m working on making food out of food.
Garlic Ginger Seitan Lettuce Wraps
Ingredients
- 1/2 pound seitan
- 6 big leaves lettuce (bibb, butter, romaine)
- 2 cups claytonia, sprouts or misc. greens
- 1 inch ginger, minced
- 3 cloves garlic, minced
- 3 large carrots, minced
- 1 cup mushrooms, chopped
- 1.5 tablespoons mirin
- 1.5 tablespoons soy sauce or tamari
- 2 medium scallions, chopped
- about a teaspoon red pepper flake (to taste)
- .5 teaspoon toasted sesame oil
- 1 tablespoon oil (safflower, or whatever)
Instructions
Marinate seitan in mirin and tamari while prepping veg.
Heat oil on high heat in wok, add carrots and stir fry a minute until they begin to soften (longer for larger carrots).
Turn to medium, add garlic and ginger, and toss.
Add mushrooms and seitan, breaking seitan up with a spoon. Toss.
Add claytonia (or sprouts, or greens) and toss to wilt. Turn heat off and add scallions, red pepper flake and toasted sesame oil. Toss.
Wash six large lettuce leaves and dry. Serve hot seitan mixture on leaves, wrapping like a taco.
Details
- Prep time: 5 mins
- Cook time: 15 mins
- Total time: 20 mins
- Yield: 3 servings
Sarah's Garden: Transplanting time
It may be a little early but my tomatoes were getting too big for their little pots so it was time to give them a little more space:
This year I tried to make sure I got most of the main stem up to the first real leaves underground when I transplanted so that each plant has a chance to grow more roots (better for water retention which is a major problem in the summer.) You just pinch off the two little baby leaves, which are the first to sprout but don't look like real tomato leaves and are usually much lower on the stem than the rest of the leaves:
If we wanna get real scientific here, those leaves are also called cotyledon leaves [end science.] I pinch them off and then attempt to get the plant out of the dirt with minimum root damage:
Then (or before, if you're smart) you get your new pot and prepare it for planting. Drainage is key: trust me, tomatoes don't grow in standing water (and neither does much of anything unless you're growing water plants or moss.) Most pots already have drainage holes in the bottom but if yours don't you'll need to make some. Last year I made some just using some old scissors and lots of upper body strength but it's far easier to use an electric drill and less upper body strength. Whichever way you choose, you're going to want holes that are big enough so that they won't get clogged with clumps of dirt and I always err on the side of more holes because you can always add water but getting rid of excess water is a bit harder.
Regardless of how you make the holes, you then need to make sure that all the soil doesn't just fall out of the drainage holes. You need to water to drain but you don't want all the nutrient-rich soil to drain also. You can use various things to keep your soil inside the pot; I like a layer of stones or old broken pots:
The only thing to watch with stones is that they don't get stuck inside a drainage hole - if you're worried about that, larger pieces of cement or broken pots work especially well.
All that's left is to plant! So cover your drainage material with soil and whatever else you like (I add compost) and soon you'll have a little corner garden like this:
As soon as you plant each pot, water it until you see water coming out the drainage holes in the bottom - this will ensure that there's enough water and also that your drainage holes are working. Then I usually water everything one more time to make sure. Things'll look a little droopy at first (see above) but in a few days your plants will get used to their new homes and perk up.
If you're interested in potting or re-potting some things or have questions on any of this, please join me on Sunday, May 6th from 2-4pm at Passyunk Gardens for the Container Gardening Workshop! There was some info on it in the latest SPFC newsletter and here's the link to the Facebook event page. I'll be leading everyone through container gardening basics and offering some insights of my own (naturally.) Bring your own container and plants/seeds but I'll also have a few containers and extra seeds as well. It'll be a planting party, which is fast becoming my favorite sort of party. Hope to see some readers there!
Happy 2nd Anniversary, South Philly Food Co-op
2nd Anniversary After Party at Devil's Den
11th and Ellsworth, Philadelphia, PA 19147 Saturday, April 28, 2012 4pm to 7pm We'll continue the 2-year anniversary celebration with drink and food specials at Devil's Den. 20% off food and $1 off drinks from for Co-op members with wristbands or member cards. Not a member-owner yet? Don't wait until the 28th to get in on the fun. After all, we'd like to be celebrating achieving our first goal of 250 Founding Members. Go to our website to use our super simple online application.Agenda for Spring Membership Meeting and Minutes from Fall Membership Meeting
- Member check‐in, pick up ballots, mingle and potluck (6:00 – 6:30pm)
- Welcome and introductions 6:30
- Announce election/ proposed bylaw changes/voting procedure (6:35)
- Approve minutes from October membership meeting (6:40)
- Committee Updates (6:45 – 7:05)
Business Outreach Grants IT Leadership Legal Marketing and Communications Membership Programs and Events/Speakers Bureau
- FY12 Budget recap (7:05 – 7:10)
- Market study from Keystone Development Center (7:10 – 7:40)
- Timeline and project budget (7:40 – 8:15)
- Q &A (8:15 – 8:30)
- Present election results (8:30)
- Adjourn (8:35)
Spring Membership Meeting
Sarah's Garden Goes to Longwood Gardens!
Okay, so my garden didn't go to Longwood Gardens...but I did! Somehow in all my years of living here I'd never been to Longwood. Crazy! But a nice weekend and a birthday present (thanks, sweetie!) meant that it was finally time to go. I took tons of pictures but I thought I'd share the best ones with you all.
Although I failed to get a picture of the exterior (nice one, Sarah) the huge conservatory was what I most wanted to see. There's a fern room! And a succulent room! And like 500 other rooms and we went to all of them. My boyfriend is very patient. Here's part of the conservatory that I found particularly pretty:
The floor looks so shiny because it was designed to hold a few inches of water to reflect the plants. If I was a better photographer I probably would have gotten more of the reflection in the picture. But I like this shot because it's what I think of when I think of the word "conservatory." Well, this and Clue.
Moving on! There was a cacti room, which was awesome, and also home to these little guys:
Aren't they cute? I feel like they need haircuts.
Along with the cacti are the succulents. There was a lot of aloe of all different colors, but I liked these:
I like how many of them there are. If I ever live in a place where I can grow succulents and cacti in my back yard, I'm totally growing those hairy things and lots of aloe.
I took this picture because of the Crown of Thorns, which is the tall, thorny plant in the planter:
Here's my Crown of Thorns this past summer:
Obviously mine is not as big and is also not variegated (the leaves are all green instead of green and white) but it did pretty well this winter inside and will hopefully be back outside soon.
Next we have some Spanish moss:
I love Spanish moss and would definitely grow it if I lived in the south. It just seems so Southern Gothic, a genre of fiction that just happens to include some of my favorite American writers (William Faulkner, Truman Capote, Flannery O'Connor, Tennessee Williams, Carson McCullers to name a few.) Don't you guys all imagine Spanish moss dripping from every branch while reading "Suddenly Last Summer"? Okay, that's probably just me.
This is spurge:
And that's all I'm going to say about that.
They also grow bananas!
You can see actual bananas in the lower right hand corner! I actually hate bananas but love how banana trees look. It's a hard life I live.
On to the ferns! This is one of my favorites:
This is a stag horn fern and I just love how they look. Someday I will have one of my very own.
And here's this little cutie:
This is a passionflower and I would like to try my hand at growing these one summer. Maybe next year...
This is a ginkgo bonsai:
It's a couple of feet tall and I'm not sure if you can see it, but the sign on it says that training began in 1909. Wow! Ginkgos are some of the oldest trees in the world; some in their native Asia are over 1,000 years old. In fact, there is one at Bartram's Garden which is one of the oldest in North America. Here's a good source for more ginkgo history, if you're interested, which mentions the Bartram's Garden ginkgo and also the two old ginkgos in Woodland Cemetery which have since been cut down.
Lastly, here are some adorable little venus fly traps. Look at their little mouths!
These guys are really small - about the size of a nickel. So don't be scared! They won't eat you.
Hope you all enjoyed my little interlude...back to plants I have actually grown next week!
Welcoming Zipcar, Wake Up Yoga, and Wash Cycle Laundry to Shop South Philly
We'd like to welcome our three newest participants in the program - Wash Cycle Laundry, Zipcar and Wake Up Yoga.
Wash Cycle Laundry is offering South Philly Food Co-op member-owners a 50% discount on first service (must spend $15).
Wake Up Yoga is offering returning students a $5 discount on a 5-class card and a $10 discount on a 10-class card. And of course, they offer new students a two-week unlimited class card for just $30.
Zipcar is offering $75 in free driving with all new memberships. Limited to new Zipcar members.
Thank you to all the businesses who are participating in this program.
Do you own or manage a business in the South Philadelphia area? The South Philly Food Co-op wants to partner with locally-owned and like-minded businesses. Support the movement by joining Shop South Philly to offer a special discounts to co-op members. In turn, we encourage our supporters and members to patronize your business through cross promotion on our website, blog, e-news, and Facebook. You set your own discount and we do the rest. Contact [email protected] for more information.
Mustard Glazed Mustard Greens

This is a quick one. Barely a recipe, and more like what happened to my mustard greens.
I have a confession to make... I cook all my greens the same way. I use greens in lots of dishes, anywhere they'll fit, but if I'm just making up a bunch of greens, it's garlic, a bit of vinegar, and if we're feeling luxurious, some bacon. But that's the routine, always.
And it's mustard green time. Yay for new veg. I got some mustard greens (this one is Mizuna, from the unGoogleable Silver Mine Farm) and I had already made salad of another variety and thought it was time to get cooking. But as much as I love garlic and vinegar on greens, it was time for a change.
You know what mustard greens go well with? It's so obvious. Mustard. These aren't as tough as collards or kale but they're not nearly as wimpy as spinach and they can take a little texture. Plus, they already have that lightly peppery thing going for them. Let's play that up. Four ingredients, happy side dish.
I started with six ounces of mustard greens, (stems and all with the Mizuna). This recipe, like everything else, is infinitely scalable, so adjust to your own greens.
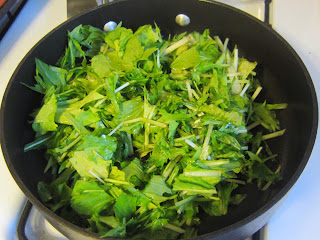
Into a saute pan with a teaspoon of oil. I use olive, but use what you like. Heat to medium, stir and flip occasionally until the greens start to wilt.

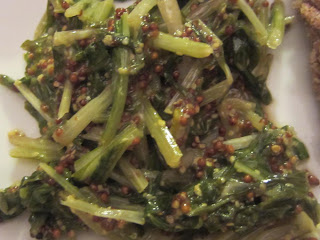
The photo doesn't quite depict how wilted these greens were. They were yielding to a spatula and heading towards soft. I added a tablespoon of very grainy mustard. I don't think this is the place for yellow mustard. Stir that around, leaving the heat on, for maybe a total of 15 minutes cooking time. Then squirt with the juice of half a lemon, stir again, and serve. It's like that.
This recipe is cross-posted at Saturday’s Mouse, where I’m working on making food out of food.
Mustard Glazed Mustard Greens
Ingredients
- 6 oz Mustard Greens, chopped
- 1 teaspoon Olive oil
- 1 tablespoon Grainy Mustard
- 1 tablespoon Lemon Juice
Instructions
Chop up your mustard greens and set them in the oil on medium heat to wilt, stirring and flipping occasionally for maybe 5 minutes.
When they begin to soften, add the mustard and stir and flip. Continue to heat over medium until fully wilted, maybe another 10 minutes.
Squeeze on the juice of half a lemon, about a tablespoon or so, and stir. Serve hot.
Details
- Prep time: 2 mins
- Cook time: 15 mins
- Total time: 17 mins
- Yield: 2 servings
Coffee with the Co-op
Saturday, 4/21 at Black N Brew on Passyunk Avenue - 9am to noon
Saturday, 5/12 at Red Hook Coffee & Tea in Queen Village - 9am to noon
Saturday, 5/19 at Ultimo in Newbold - 9am to noon
We need a few volunteers to help answer questions, pass out fliers, and take applications. If you would like to volunteer to at one of these events, please email [email protected].
Sarah's Garden: Food!
Hi, friends. Little tomatoes are coming along! Look, they're even beginning to look like actual tomato plants:
But the best thing this past week has been my greens. Check out my one surviving chard!
This one little (not so little anymore) chard survived the too-wet soil and winter and now is looking good! I absolutely love those bright red stems. I'll definitely be planting more of these and some more kale either in the late summer (for fall harvesting) or fall (for spring harvesting.) And...
My first little spinaches! And they taste good! I feel like I could eat them now and call them "microgreens" (which I do when I'm thinning out the arugula and want to feel fancy, ie all the time) but I'm going to let them get a little bigger.
I have a few new plants to introduce to you but they are still settling in so we'll see them next week. Patience!